A Room-by-Room Home Safety Checklist for Aging Parents
A home safety review can feel overwhelming when you are trying to help an older parent stay independent. It is not always obvious which changes matter most, which risks are urgent, or what can wait until later.
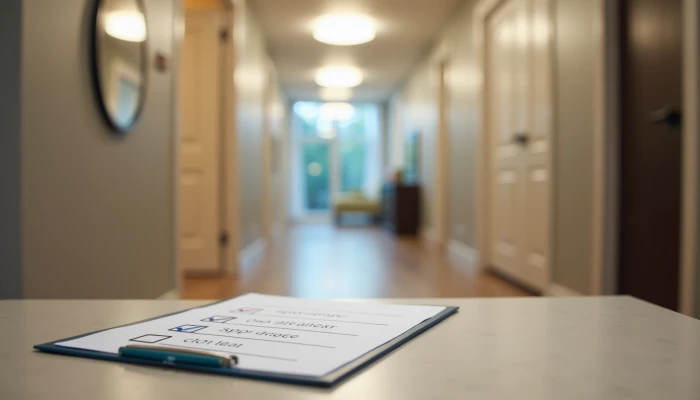
A structured checklist makes that process easier. Instead of trying to fix everything at once, you can move room by room, look for common hazards, and note practical changes that support safer aging at home.
Public health and fall-prevention guidance commonly emphasizes simple steps such as reducing tripping hazards, improving lighting, and making frequently used spaces easier to navigate. This guide follows that approach.
Use it as a starting point for your own walk-through.
- Check one room at a time.
- Mark each item as safe now, needs improvement, or needs professional review.
- Prioritize changes that affect daily routines like bathing, walking, cooking, and using stairs.
This checklist does not replace medical advice or a professional home assessment. But it can help families identify common risks and prepare for more informed next steps.
Bathroom Safety Evaluation
Bathrooms deserve close attention because they combine water, hard surfaces, tight spaces, and frequent transfers in and out of the shower and near the toilet. Even a small layout problem can make daily routines harder.
Start with the floor and entry points. Look for slippery tile, bath mats that slide, raised thresholds, and clutter near the sink or toilet. If the person uses a cane, walker, or needs support while turning, make sure there is enough room to move without bumping into cabinets or baskets.
Use this bathroom checklist during your walk-through.
- Check whether the floor stays slippery after bathing or handwashing.
- Remove loose rugs or se them so they do not shift.
- Confirm there is a stable place to step in and out of the shower or tub.
- Assess whether grab bars for seniors are placed where support is actually needed, such as near the toilet and bathing area.
- Check whether towel bars or soap dishes are being used for balance. If they are, that is a sign proper support may be missing.
- Review whether shower chairs for seniors would make bathing easier if standing is tiring or unsteady.
- Make sure soap, towels, and toiletries are easy to reach without bending or twisting.
- Check that the bathroom door can open fully and does not block movement.
For bathroom safety for seniors, placement matters as much as equipment. A shower seat that is hard to reach or a support bar placed too far from the transfer point may not help much in practice.
If you notice difficulty stepping over a tub wall, repeated grabbing at unstable surfaces, or trouble getting on and off the toilet, it may be time to ask an occupational therapist, contractor experienced in accessibility work, or another qualified professional to review the space.
Lighting Requirements for Fall Prevention
Good lighting helps people notice changes in flooring, cords, steps, and objects in the walking path. It also matters during nighttime trips to the bathroom, early morning routines, and tasks that require close attention.
Walk through the home at different times of day if possible. A room that seems bright at noon may feel dim in the evening. Also look for glare, deep shadows, and switches that are hard to reach from the doorway or bedside.
Focus on these lighting checkpoints.
- Make sure stairways, entryways, kitchens, bathrooms, and hallways are well lit.
- Add task lighting where close work happens, such as over counters, sinks, and reading areas.
- Check that light switches are easy to find when entering a room.
- Consider motion-sensor lighting for hallways, bathrooms, and paths used at night.
- Reduce glare from bare bulbs, reflective floors, or overly bright overhead fixtures.
- Replace burned-out bulbs promptly and keep bulb types consistent where possible.
- Make sure bedside lighting is easy to reach before standing up.
- Check outdoor lighting at steps, porches, and walkways.
A simple way to prioritize lighting changes is to rate each area by use and risk.
| Area | Used often? | Low light at key times? | Uneven floor or obstacles? | Priority |
|---|---|---|---|---|
| Bathroom path | Yes | Yes | Possible | High |
| Stairs | Yes | Sometimes | Yes | High |
| Guest room | No | No | No | Low |
Lighting alone will not prevent every fall, but it can make hazards easier to see and daily movement more predictable.
Mobility Product Placement
Mobility aids are most helpful when they are easy to access and fit the home layout. A walker left across the room or a cane stored behind furniture may not be available when it is needed most.
Start by observing normal routines. Where does the person usually stand up, sit down, get dressed, or pause for support? Those are the places where mobility product placement should be evaluated.
Check the following.
- Keep walkers or rollators near the bed, favorite chair, or bathroom route if those are frequent transfer points.
- Make sure pathways are wide enough for the aid being used.
- Remove small tables, cords, baskets, or plant stands that narrow walking space.
- Store mobility aids in dry, easy-to-reach locations rather than in closets that require bending or lifting.
- Check whether furniture is stable enough to sit down safely beside a walker or cane.
- Make sure frequently used items are reachable without carrying them while managing a mobility aid.
- Review whether door thresholds, rugs, or crowded corners interfere with wheels or foot placement.
This quick placement review can help.
| Item | Good placement looks like | Warning sign |
|---|---|---|
| Walker or rollator | Within easy reach before standing | User walks unsupported to get it |
| Cane | Stored upright near common seating areas | Left in another room |
| Wheelchair | Clear turning space and open path | Tight corners or blocked routes |
| Shower chair | Ready in bathing area when needed | Must be carried in each time |
If the person has started leaning on walls, skipping the aid for short trips, or struggling to move through doorways, the issue may be placement, fit, or home layout rather than motivation. That is often a good point to ask for professional guidance.
Kitchen Safety Checkpoints
The kitchen combines standing, reaching, carrying, heat, and sharp tools. Small changes here can reduce daily strain and make meal preparation more manageable.
Begin with the floor and walking path. Loose rugs, slick spots, pet bowls, and crowded traffic areas can create avoidable tripping hazards. Then look at storage. If commonly used dishes, food, or cookware require climbing, bending deeply, or reaching overhead, the setup may need adjustment.
Use this kitchen checklist.
- Remove loose rugs or replace them with sed non-slip mats if needed.
- Keep walkways clear between the sink, refrigerator, stove, and table.
- Place everyday items at waist to shoulder height when possible.
- Reduce the need for step stools by moving commonly used items lower.
- Check lighting over countertops, the sink, and cooking areas.
- Keep frequently used small appliances where they do not need to be lifted often.
- Organize drawers and shelves so heavy items are easy to access.
- Review whether cabinet hardware and faucets are easy to grip.
If a lower storage setup is possible, it can reduce repeated reaching and bending. The goal is not to remodel everything at once. Often, reorganizing what is already there is a useful first step.
Also pay attention to behavior. If the person avoids the kitchen, leaves items on the counter because cabinets are hard to use, or carries objects while trying to steady themselves, those are signs the space may need changes.
Stair Safety and Accessibility
Stairs can be manageable for some older adults and a major barrier for others. The key is to assess how the stairs are actually used, not just whether they look acceptable at a glance.
Check both the staircase itself and the approach to it. Clutter near the top or bottom step, poor lighting, uneven surfaces, or missing hand support can all increase risk.
Review these stair safety points.
- Confirm there are sturdy handrails on both sides if feasible.
- Check whether the handrails are easy to grip from start to finish.
- Make sure each step surface is even and in good repair.
- Use non-slip treads or other slip-resistant surfaces where appropriate.
- Improve lighting at the top, bottom, and along the full stair run.
- Remove objects stored on steps or near landings.
- Check for patterned surfaces that make step edges harder to see.
- Review whether carrying laundry, groceries, or other items makes stair use less safe.
For some households, a stair lift may become part of the discussion. That decision depends on the person's mobility, how often stairs are used, and whether the home has essential living spaces on one level. It is not a do-it-yourself project and should be reviewed with qualified installers and, when helpful, a clinician or occupational therapist.
If there have been near-falls on stairs, hesitation before climbing, or increasing reliance on walls instead of rails, treat that as a prompt for a more detailed review rather than waiting for a serious incident.
Conclusion
A useful home safety assessment does not require perfection. It requires a clear process, honest observation, and a willingness to make practical changes over time.
As you work through each room, keep a short action list.
- Fix immediate hazards first, such as loose rugs, poor lighting, or blocked pathways.
- Note larger changes that may need budgeting or professional installation.
- Recheck the home after health changes, hospital visits, or new mobility issues.
Regular reviews matter because needs can change. A setup that worked well six months ago may not fit current routines now.
If you are unsure how to adapt the home, or if daily tasks are becoming harder despite basic improvements, consider asking a healthcare provider or occupational therapist for personalized guidance. Home changes can support independence, but they work best when matched to the person's actual abilities and routines.