Safer at Home Without a Major Remodel
Making a home safer for an older adult can feel expensive before you even begin. Many families assume that aging in place always means major remodeling, long contractor timelines, or specialty equipment that strains a fixed income.
In reality, many useful home modifications for seniors are smaller, simpler, and easier to phase in. The most helpful approach is usually to start with the areas that create the most daily risk, choose low-cost changes first, and save larger projects for later if they are truly needed.
This guide walks through practical upgrades that can improve safety and comfort without promising perfect results. It also covers where to look for grants and assistance programs if the budget is tight.
Prioritizing High-Impact, Low-Cost Modifications
When money is limited, the goal is not to fix everything at once. It is to identify the changes most likely to reduce common hazards and make daily routines easier.
Implementation guidance commonly puts bathrooms near the top of the list because they combine water, hard surfaces, and frequent transfers in and out of the tub, shower, or toilet. Hallways, stairs, and entryways also matter because poor lighting and clutter can increase the chance of a misstep.
A simple way to prioritize is to look for changes that are low-cost, low-disruption, and useful every day.
Use this quick sequence:
- Address slipping and transfer risks in the bathroom.
- Improve lighting where someone walks at night or changes levels.
- Remove trip hazards such as loose rugs, cords, and clutter.
- Add easier-to-use hardware, such as lever-style handles.
- Reassess before spending on bigger structural work.
Many basic safety fixes are non-invasive. That means they do not require opening walls or changing the home’s structure. Examples include brighter bulbs, motion-sensor lights, nonslip mats, and better furniture placement.
This kind of step-by-step approach also helps families avoid overspending on upgrades that may not match the older adult’s current needs.
A practical first-pass checklist can help:
- Is the bathroom floor slippery when wet?
- Is there a se place to hold on near the toilet or shower?
- Are stairs, hallways, and entry doors well lit?
- Are walking paths clear and wide enough for a cane or walker?
- Are frequently used items easy to reach without bending or climbing?
- Are door handles and faucets hard to grip?
If the answer to several of these is yes, start there before considering larger projects.
Affordable Bathroom Safety Upgrades
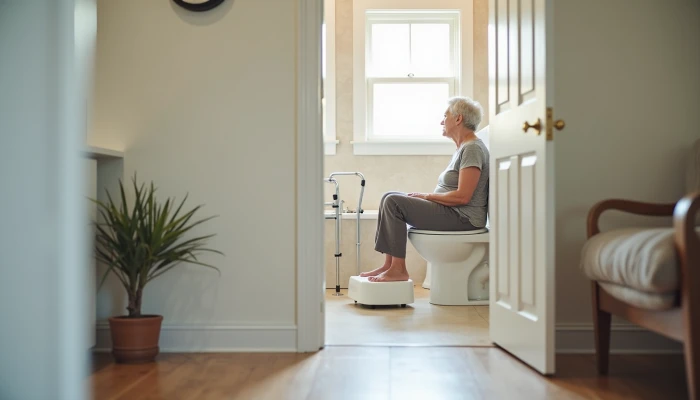
Bathroom safety for seniors is often the best place to begin because even small changes can make bathing and toileting easier and less stressful.
Cost references in the source set show that some common low-cost upgrades fall roughly in the $25 to $500 range, depending on the item, installation needs, and local labor costs. Grab bars for seniors are one example. The lower end may apply to the hardware itself, while the higher end may reflect professional installation or more complex placement.
The key is to focus on function, not appearance.
Useful bathroom upgrades include:
- Grab bars near the toilet and inside the shower or tub area
- Nonslip bath mats or strips on wet surfaces
- A shower chair for seniors who tire easily or feel unsteady standing
- A handheld showerhead to reduce awkward reaching and turning
- A small threshold ramp if there is a lip that creates a tripping point
These changes are often more realistic for a tight budget than a full bathroom remodel.
A simple planning table can help compare common options.
| Upgrade | Why it may help | Budget note |
|---|---|---|
| Grab bars | Supports transfers and steadiness in key spots | Costs vary by bar type and installation |
| Nonslip mat or strips | Adds traction on wet floors | Often one of the lowest-cost changes |
| Shower chair | Allows seated bathing for some users | Usually lower cost than structural changes |
| Handheld showerhead | Reduces twisting and reaching | Often a modest upgrade |
| Threshold ramp | Smooths a small transition | Cost depends on height and fit |
One important caution: bathroom grab bars need se installation in the right location. If there is any doubt about wall support or placement, it is safer to use a qualified installer rather than treat it as a casual DIY project.
Simple Lighting and Accessibility Improvements
Lighting problems are easy to underestimate because the home may feel familiar. But familiar spaces can still become harder to navigate when vision changes, especially at night.
Improving visibility is often one of the least disruptive ways to support independent living. Hallways, bathrooms, stairs, and exterior entry points are common places to start.
Practical lighting and access changes include:
- Motion-sensor lights for nighttime trips to the bathroom
- Brighter bulbs where shadows make edges harder to see
- Bedside lighting that is easy to reach before standing up
- Entryway lighting that turns on reliably in the evening
- Lever-style door handles if round knobs are difficult to grip
Some source material also notes that lever hardware and similar accessibility swaps can be relatively affordable. They do not solve every mobility issue, but they can reduce daily strain for people with arthritis, weakness, or limited hand dexterity.
A few mistakes are worth avoiding.
| Common issue | Lower-cost fix |
|---|---|
| Dark hallway at night | Add motion-sensor lighting |
| Hard-to-turn doorknob | Replace with lever handle |
| Glare or deep shadows | Use more even, layered lighting |
| Reaching for a distant switch | Add easier-access lamps or sensors |
These changes work best when paired with basic housekeeping. Better lighting helps, but it cannot compensate for cluttered walkways, unstable rugs, or items stored where someone has to stretch or stoop to reach them.
Non-Invasive Modifications for Mobility
Not every mobility-related change requires a contractor or a major renovation. Non-invasive modifications can improve access while preserving flexibility if needs change later.
Threshold ramps are one example. A small height difference between rooms or at a doorway may not seem significant, but it can catch a foot, walker, or wheelchair wheel. A properly sized ramp can make that transition smoother.
Other lower-disruption ideas may include easier-to-reach storage, furniture rearrangement to widen pathways, and hardware changes that reduce gripping or twisting.
Some sources mention features such as wall-mounted sinks or lowered counters as accessibility improvements. Those can be helpful in the right home, but they may move beyond a truly low-cost or non-invasive project because installation needs vary. For a budget-focused plan, it usually makes sense to begin with simpler changes first and only explore these options if they address a clear daily barrier.
A practical way to decide is to score each idea by three factors:
- Safety impact: Does it address a real trip, slip, or transfer problem?
- Ease of installation: Can it be added without major construction?
- Daily usefulness: Will it help with routine tasks every day?
Changes that score well in all three categories are often the best starting points.
Examples that often fit this approach include:
- Threshold ramps at small interior transitions
- Grab bars in shower and toilet areas
- Lever handles on doors or faucets
- Reorganizing frequently used items to waist height
- Creating wider, clearer walking paths through main rooms
These steps do not replace a professional assessment when mobility needs are complex. But they can be a practical first layer of support for households trying to improve access without taking on structural work too soon.
Grant Programs and Financial Assistance
If the budget is the main obstacle, it is worth checking for outside help before assuming every cost must be paid out of pocket.
Available programs vary by location and eligibility, but common starting points include Medicaid-related home and community-based supports, Veterans Affairs programs for eligible veterans, local nonprofit repair programs, and community aging services.
A good first step is to contact the local Area Agency on Aging. These agencies can often point families toward community-specific grants, repair assistance, or referral programs that are easier to miss when searching on your own.
Possible funding paths to ask about include:
- Medicaid-related programs in your state for qualifying home accessibility needs
- VA housing or accessibility support for eligible veterans
- Local nonprofit or community development repair programs
- County or city grants for safety-related home improvements
- Disease-specific or disability-focused charitable assistance programs
Some financial guidance sources also discuss reverse mortgages or possible tax deductions for qualifying modifications. Those options can be more complex and depend on personal circumstances and local rules. They are worth discussing with a qualified advisor before making decisions based on them.
To stay organized, gather these details before applying:
- The specific modification needed
- A short explanation of the safety problem it addresses
- Basic cost estimates or contractor quotes if required
- Proof of income, age, disability, or veteran status if applicable
- Photos of the area if a program requests documentation
Not every household will qualify for grant help, and funding may be limited. Still, combining a few low-cost changes with even modest assistance can stretch a budget much further than paying for everything at once.
Conclusion
A safer home does not always start with a major remodel. In many cases, the most practical first steps are modest ones: better lighting, safer bathroom setup, easier-to-use hardware, and clearer walking paths.
These changes may not remove every risk, and they are not one-size-fits-all. But they can make daily routines more manageable while helping families spend carefully.
If funds are limited, focus on the highest-impact areas first and ask about local assistance before moving to larger projects. Small, well-chosen improvements can be a realistic way to support comfort and independence at home.