How to Check an Older Adult’s Home for Safety Problems
A home safety assessment can help families make aging at home more manageable and less overwhelming. The goal is not to create a perfect house or promise that every risk can be removed. It is to look carefully at how an older adult actually moves through the home, where daily routines feel difficult, and which hazards can be improved with realistic changes.
For many caregivers, the hard part is knowing where to start. A structured walkthrough makes the process easier. Instead of trying to fix everything at once, you can inspect one area at a time, document what you see, and prioritize the changes that matter most.
This guide follows a practical assessment workflow, covers common safety concerns, and offers simple DIY ideas that may improve comfort and access. It also explains when a self-check is useful and when a professional evaluation may add important insight.
Visual Inspection Workflow: Key Areas to Evaluate
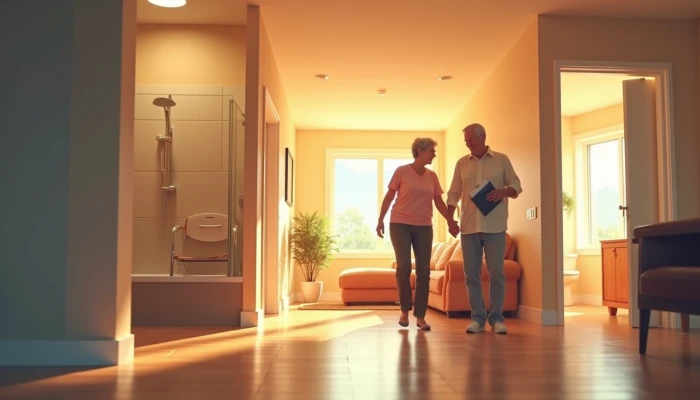
A useful home safety assessment starts with observation, not shopping. Walk through the home as if you were following the older adult’s normal day: getting out of bed, going to the bathroom, preparing food, sitting down, answering the door, and moving between rooms. This kind of visual inspection often reveals risks that are easy to miss when you only look at one room in isolation.
Many caregiver checklists emphasize starting with higher-risk areas such as bathrooms and stairways, then moving to kitchens, bedrooms, entrances, and common walking paths. As you inspect each space, focus on whether the person can move safely, reach what they need, and use the room without extra strain.
Use this simple workflow.
- Start outside the home and at the main entrance.
- Move room by room in the order the person uses the space most often.
- Watch for lighting, flooring, clutter, storage access, and support surfaces.
- Note anything that could increase slipping, tripping, overreaching, or rushing.
- Write down what needs immediate attention versus what can wait.
A basic checklist can keep the walkthrough focused.
| Area | What to look for |
|---|---|
| Entryways | Uneven steps, loose mats, poor lighting, hard-to-open doors |
| Hallways | Clutter, cords, narrow pathways, dim bulbs |
| Bathroom | Slippery surfaces, lack of support near toilet or shower, hard-to-reach items |
| Kitchen | Frequently used items stored too high or low, unstable stools, crowded walkways |
| Bedroom | Difficult bed height, poor nighttime lighting, obstacles between bed and bathroom |
| Stairs | Missing or weak handrails, worn treads, poor visibility |
It also helps to test the space from the older adult’s point of view. Sit in their usual chair. Try reaching the bathroom at night with only the available lighting. Check whether toiletries, towels, dishes, and medications are stored in places that require bending, twisting, or climbing.
Documenting findings matters. A written list or phone notes can help you track what you found, what was changed, and what still needs attention. That record is also useful if other family members, a home care provider, or a professional evaluator becomes involved later.
Common Hazard Identification: Fall Prevention and Accessibility
Once you have a workflow, the next step is identifying the hazards that show up most often. Many are simple environmental issues, but they can have a big effect on daily safety and confidence.
Bathrooms deserve special attention because they combine water, hard surfaces, and frequent transfers. For bathroom safety for seniors, check whether there is stable support near the toilet and bathing area, whether the floor becomes slippery, and whether the path from the bedroom is well lit. If there are existing grab bars for seniors, make sure they feel se rather than loose or decorative. Guidance commonly used in caregiver checklists also recommends setting water temperature to 120°F or below to reduce scald risk.
Stairs are another priority area. Look for a sturdy handrail, clear edges on each step, and lighting that makes the full staircase easy to see. Worn carpeting, objects left on steps, and carrying items while climbing can all add risk.
Across the rest of the home, common hazards often include:
- Loose rugs or mats that shift underfoot
- Electrical cords crossing walkways
- Low furniture or footstools in travel paths
- Glare, shadows, or dim lighting
- Frequently used items stored too high, too low, or too far back
- Slippery floor transitions between rooms
- Pets, pet bowls, or clutter in narrow paths
A practical way to prioritize findings is to sort them by urgency.
| Priority level | What it usually includes | What to do first |
|---|---|---|
| High | Slippery bathroom surfaces, unstable supports, stair hazards, blocked pathways | Address as soon as possible |
| Poor storage layout, minor lighting gaps, furniture crowding | Plan next round of changes | |
| Lower | Convenience improvements that reduce strain but are not immediate hazards | Add over time |
Accessibility is not only about falls. It also includes whether the person can complete daily routines without unnecessary effort. For example, a kitchen may not look dangerous at first glance, but if everyday dishes are stored in a high cabinet and the person uses a chair or step stool to reach them, the setup is not working well.
The same is true in bedrooms and living areas. If the person has trouble standing from a soft chair, reaching a lamp, or getting to the bathroom quickly at night, those are important findings. A home safety assessment should reflect real routines, not just obvious physical hazards.
DIY Modification Ideas: Cost-Effective Solutions for Safety
Not every improvement requires a major remodel. Many useful changes are small, affordable, and focused on reducing strain during everyday tasks. The safest DIY approach is to stick to simple, non-structural changes and avoid projects that require electrical, plumbing, or major construction work.
In bathrooms, common low-cost upgrades may include shower chairs for seniors, non-slip bath mats, handheld shower storage placed within easy reach, and better organization so items are not left on the floor. Lever-style handles can also be easier to use than round knobs for people with limited grip strength.
Other practical DIY ideas include:
- Removing loose throw rugs
- Adding brighter bulbs where lighting is dim
- Using night-lights along the path from bed to bathroom
- Applying non-slip tape on stair edges or slick transitions
- Rearranging furniture to widen walking paths
- Moving everyday items to waist-to-shoulder height
- Using labeled bins or open baskets to reduce clutter
A simple implementation sequence can help keep the project manageable.
- Fix hazards that could cause an immediate slip or trip.
- Improve lighting in key walking areas.
- Reorganize storage to reduce reaching and bending.
- Add comfort and access items that support daily routines.
- Reassess the space after changes are made.
The kitchen and living room often improve quickly with reorganization alone. Clearing pathways, reducing visual clutter, and placing common items in easy-to-reach spots can make movement simpler without buying anything new.
It is also helpful to think in terms of effort reduction. If a change makes it easier to bathe, dress, cook, or move from room to room, it may support independence even if it does not look dramatic.
That said, DIY changes have limits. A simple modification can reduce a hazard, but it cannot solve every mobility or balance issue. The goal is to make the environment easier to use, not to assume the environment is the only factor involved.
When to Seek Professional Evaluation: Complementing DIY Efforts
A self-assessment is a useful starting point, but some situations call for professional input. If the home needs structural changes, the older adult has complex mobility needs, or the family is unsure which changes are most appropriate, a professional evaluation can add clarity.
This is especially true when you are considering larger modifications such as ramps, bathroom layout changes, doorway widening, or other accessibility work. It can also help when the person’s needs are changing quickly and the home setup no longer matches how they move through daily routines.
Professionals may use your notes as a baseline. That can make the visit more productive because you can already show where problems happen, which tasks are difficult, and what changes have already been tried.
A professional evaluation may be worth considering when:
- Falls or near-falls are becoming more frequent
- Transfers in and out of bed, chairs, tubs, or toilets are difficult
- The home may need structural modification
- Vision, cognition, or mobility changes make routines harder to assess on your own
- Family members disagree about what should be changed first
Some families look for occupational therapists or housing professionals with aging-in-place training, including CAPS-certified specialists. Free or low-cost checklists from established organizations can also help you prepare before seeking outside help.
The key point is that DIY and professional assessment do not compete with each other. A careful caregiver walkthrough can uncover immediate issues and guide simple improvements. A professional can then help with more complex decisions, especially when safety concerns involve layout, access, or changing physical abilities.
Using both approaches together often creates a more realistic plan for aging at home than relying on guesswork alone.
Conclusion
A home safety assessment does not need to be complicated to be useful. A calm, room-by-room review can help you spot hazards, improve daily routines, and make practical decisions without trying to solve everything at once.
Start with observation. Focus on bathrooms, stairs, lighting, flooring, and storage. Make simple changes where you can, document what you find, and revisit the home regularly as needs change.
For many families, the best approach is a combination of small DIY improvements and professional guidance when the situation becomes more complex. That balance can support safer, more comfortable aging at home while respecting the older adult’s routines and independence.