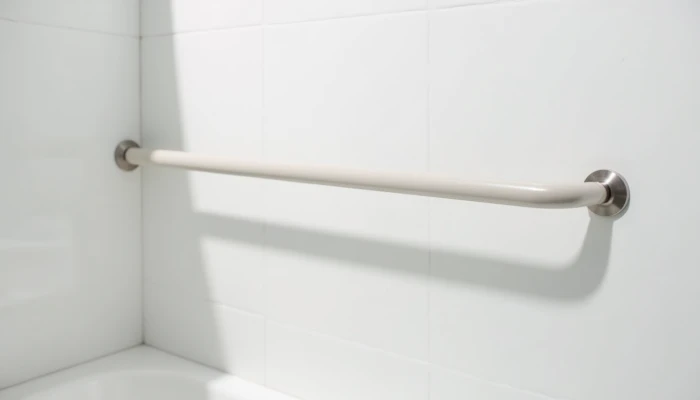
Should You Install Grab Bars Yourself or Hire a Professional?
Adding grab bars can be a meaningful step for home safety for seniors, especially in bathrooms and other areas where balance is tested during standing, sitting, or transfers. But many families get stuck on the same question: is this a manageable DIY project, or is it safer to hire a professional?
The answer depends less on the bar itself and more on how it is installed. Placement, wall structure, fasteners, and the older adult's actual movement patterns all matter. A bar that looks se but is poorly anchored may not provide dependable support when it is needed most.
This guide walks through the tradeoffs in a calm, practical way. You'll see what installation standards generally require, how DIY and professional costs differ, what the available fall-prevention evidence does and does not say, and how to decide which route makes the most sense for your home.
Understanding Installation Standards and Safety Requirements
Grab bars are not just accessories. They are support devices meant to handle body weight during movement, so installation standards matter. Guidance commonly used in accessibility work emphasizes three basics: correct placement, appropriate height and spacing, and se anchoring.
In bathrooms, placement often depends on the task the person is doing. A bar near the toilet may help with sitting and standing. A bar in the shower or tub area may help with stepping in, stepping out, or steadying during bathing. That is why bathroom safety for seniors is not only about adding bars, but adding them where they match real movements.
A few practical requirements usually shape the job:
- The bar needs to be mounted to a structure that can support force.
- Placement should match the user's height, reach, and transfer pattern.
- Wall material matters, especially if the surface is tile, fiberglass, or another finish over framing.
- Decorative towel bars are not substitutes for tested grab bars for seniors.
One of the biggest safety issues is anchoring. Many installation guides stress fastening into wall studs when possible or using hardware designed for the wall type and load requirements. If the wall has no convenient stud where support is needed, the installation may require reinforcement or a different mounting approach.
User needs also matter. A standard height may not work well for someone who is shorter, taller, uses a walker, or needs support during a sideways transfer. A person who also uses shower chairs for seniors may need a different bar location than someone who remains standing while bathing.
A simple way to think about it is this: the right bar in the wrong place, or the right place with weak anchoring, can still be a poor safety setup.
DIY vs Professional Installation: Cost Breakdowns
Cost is often the reason families consider DIY first. That can be reasonable for a straightforward installation, but the full comparison should include tools, wall conditions, and the cost of getting it wrong.
Here is a practical side-by-side view.
| Cost factor | DIY installation | Professional installation |
|---|---|---|
| Grab bar and mounting hardware | Usually paid separately | May be separate or included, depending on installer |
| Tools | May need drill, stud finder, bits, level, sealant, safety gear | Usually included in labor |
| Time | Your own time for planning, measuring, drilling, and cleanup | Less homeowner time required |
| Wall complexity | Can increase cost if special bits, anchors, or repairs are needed | Usually reflected in quote |
| Risk of rework | Higher if placement or anchoring is wrong | Lower, though not eliminated |
| Structural reinforcement | Harder to estimate in advance | More likely to be identified before installation |
DIY may cost less upfront when all of the following are true:
- You already own the needed tools.
- You can confidently locate framing or otherwise meet load requirements.
- The wall surface is straightforward to drill and seal.
- The placement is simple and clearly planned.
Professional installation may cost more at the start, but it can offer value when the job is more complicated. That includes tile walls, uncertain stud locations, hollow walls, fiberglass surrounds, or situations where the older adult needs bars placed around specific transfer movements.
There are also hidden costs that families sometimes overlook.
- Patching tile or wall damage from a failed attempt
- Replacing a poorly placed bar
- Paying for a second installation after the first one does not feel se
- Water damage risk if bathroom penetrations are not sealed correctly
If you are comparing quotes, ask what is included. Some professionals charge only for labor. Others include measuring, placement planning, hardware, and minor adjustments. A low quote may not cover reinforcement or more difficult wall materials.
The key cost question is not only, "What is the cheapest way to get a bar on the wall?" It is, "What is the most reliable way to get the right support in the right place without creating a future repair or safety problem?"
Safety Considerations and Fall Prevention Evidence
Grab bars are widely used because bathrooms are common fall-risk areas, especially during stepping, turning, lowering to a seat, and getting back up. But it is important to discuss the evidence carefully.
Research and industry guidance support the idea that well-placed support features can help reduce risk during bathroom tasks. Some sources describe meaningful reductions in bathroom fall risk when grab bars are properly placed and sely installed. At the same time, not every study shows the same effect, and available evidence does not support treating grab bars as a complete fall-prevention solution.
That nuance matters. A grab bar can help with stability and transfers, but outcomes depend on several factors:
- Where the bar is placed
- Whether the user can comfortably reach and use it
- Whether the bar is anchored sely
- The person's strength, balance, and mobility pattern
- Other conditions in the room, such as slippery flooring or poor lighting
Some research also suggests that certain grab bar configurations may feel helpful but may not actually support safer movement for every transfer type. In other words, a bar can create false confidence if it is installed in a location that does not match how the person moves.
This is one of the strongest arguments for careful planning. A se bar that is poorly positioned may still be less useful than a thoughtfully placed one. And a poorly installed bar can be worse than no bar at all if the user trusts it with body weight and it shifts or fails.
For families focused on senior home safety, the practical takeaway is straightforward:
- Grab bars can be a valuable part of a broader fall-risk reduction plan.
- Their benefit depends heavily on correct placement and dependable installation.
- They should be considered alongside other bathroom safety steps, such as non-slip surfaces, better lighting, clutter reduction, and transfer-friendly layouts.
That balanced view is more useful than promising that one modification will solve every fall concern.
Factors to Consider When Choosing an Installation Method
The DIY-versus-professional decision becomes easier when you score the actual job instead of relying on guesswork. Use this quick decision checklist.
| Question | Lean DIY | Lean Professional |
|---|---|---|
| Can you reliably locate studs or otherwise meet mounting requirements? | Yes | No or unsure |
| Is the wall surface simple to work with? | Yes | Tile, fiberglass, stone, or uncertain wall build |
| Do you already have the right tools and experience? | Yes | No |
| Is the placement straightforward? | Yes | User needs are more specific or complex |
| Would a failed attempt create safety or repair concerns? | Low concern | High concern |
| Is the area high risk, such as tub, shower, or toilet transfer space? | Maybe | Often yes |
A DIY approach may be reasonable if the installation is simple, you understand the structural requirements, and you are confident you can complete the work without improvising on safety.
Hiring a professional is usually the stronger choice when:
- The wall material is difficult to drill or seal.
- You are unsure how to anchor the bar properly.
- The older adult has specific mobility limitations that affect placement.
- The installation is in a high-risk transfer area.
- You want an assessment of other hazards in the same room.
It can also help to think room by room. Bathrooms are often the highest priority because wet surfaces and transfers raise risk. Entryways and stairs may also deserve attention, but the installation details can vary based on layout and use.
If you are still unsure, use this sequence:
- Identify the exact task the bar needs to support.
- Check whether the wall structure can support that location.
- Confirm you have the tools and skill to install it to a dependable standard.
- If any part of that process is unclear, get a professional opinion before drilling.
That does not mean every home needs a specialist for every bar. It means the decision should match the complexity of the job and the consequences of a poor installation. When the goal is safe, durable support, caution is often worth more than speed.
Conclusion
DIY and professional grab bar installation both have a place. A simple job on a suitable wall may be manageable for a capable homeowner, while a more complex setup often justifies professional help.
The most important point is that grab bars are only as useful as their placement and anchoring. For aging in place, long-term reliability matters more than getting the project done quickly or cheaply.
If you are weighing the decision for an aging parent or older relative, focus on the real-world questions: where support is needed, whether the wall can safely handle it, and whether you are confident the installation will hold up under daily use. If the answer is uncertain, bringing in a senior home safety professional or qualified installer can be a practical next step.