Where Grab Bars Should Go for Safer Bathroom Support
Installing grab bars can feel straightforward until you have to decide exactly where they should go, how high they should sit, and whether the wall can safely support them. For families focused on home safety for seniors, those details matter.
This guide explains common placement rules drawn from ADA accessibility guidance in the U.S. and Canadian building and housing references. It also covers installation best practices so you can plan a safer setup without assuming that one layout works for every person or every bathroom.
Grab bars can be a useful part of bathroom safety for seniors, but they are only one part of a broader safety plan. Good placement, solid anchoring, and a layout that matches the user's movement patterns are what make them more useful in daily life.
ADA Standards for Grab Bar Placement
ADA guidance is often used as a practical starting point for grab bar placement because it gives clear measurements for accessible bathrooms. Even in private homes where ADA rules may not legally apply, these dimensions can help families and contractors choose more usable locations.
A commonly cited ADA measurement is that horizontal grab bars are installed 33 to 36 inches above the finished floor. That range is intended to place the bar within comfortable reach for many adults while supporting transfers and balance during standing and sitting.
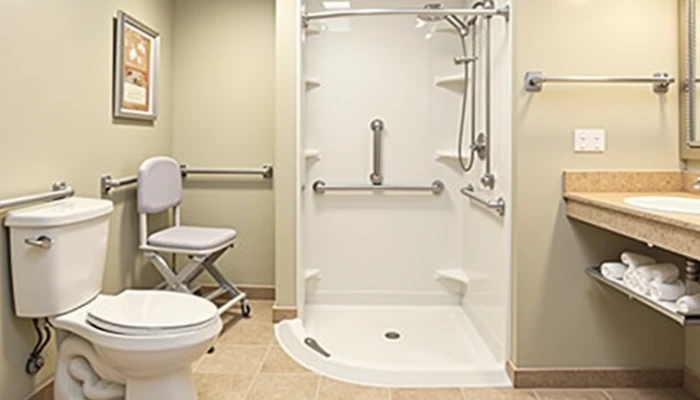
In toilet areas, placement usually focuses on the side wall and rear wall. Guidance commonly referenced in accessibility materials includes a rear wall bar that extends behind the toilet area and a side wall bar that supports sitting down and standing up. Some practical guides also discuss vertical bars near the toilet area, often placed a short distance from the back wall to help with hand positioning during transitions.
For showers, ADA-based guidance typically emphasizes horizontal bars along the control wall and back wall, with placement near entry and exit points where balance demands are often higher. A minimum 36-inch horizontal bar is often referenced for some shower applications.
The main takeaway is not just the measurement. It is the purpose behind the measurement:
- support a natural reach
- help with transfers and position changes
- avoid forcing awkward twisting
- place support where the hand is needed before balance is lost
If you are planning placement, use this simple checklist before drilling anything:
- Identify where the person steps in and out of the tub or shower.
- Note where they sit, stand, pivot, or reach for support now.
- Check whether a horizontal bar at 33 to 36 inches will align with that movement.
- Confirm that the planned location allows full hand clearance.
- Make sure the bar will not interfere with doors, shower screens, or fixtures.
That last point is easy to miss. A bar can meet a measurement guideline and still be awkward if it is blocked by a toilet paper holder, towel bar, glass door, or vanity edge.
Canadian Building Code Requirements
Canadian requirements are often discussed through a mix of housing guidance, accessibility standards, and building code references. For homeowners, one of the most important themes is reinforcement. A well-placed bar is only useful if the wall structure behind it can safely carry load.
Canadian housing and accessibility references commonly emphasize reinforcing walls around tubs and showers so grab bars can be installed sely when needed. Proposed code changes have also highlighted the value of preparing stud walls in advance for future grab bar installation. That matters for aging in place because it is much easier and less disruptive to add support later when backing is already in place.
Some Canadian guidance also references grab bar placement ranges in bathrooms, including installations around 40 to 48 inches above the floor in certain contexts. Because Canadian requirements can vary by province, building type, and whether the project is a private renovation or a regulated accessible space, it is important not to assume one number applies everywhere.
A practical way to think about Canadian code-related planning is to separate three questions:
- What location will actually help the person use the bathroom more safely?
- What structural backing is needed in that wall?
- What local code or accessibility requirement applies to this specific renovation?
This is especially important in older homes, where wall construction may not match current expectations.
Use this quick comparison when planning:
| Planning issue | Why it matters |
|---|---|
| Wall reinforcement | Helps the bar handle real-world pulling and leaning forces |
| Height range | Affects comfort, reach, and transfer support |
| Bathroom layout | Changes where support is needed most |
| Local code review | Helps avoid assuming national guidance applies exactly to your project |
For many families, the most useful Canadian takeaway is not a single universal placement rule. It is the reminder to plan for both usability and structure. If a bathroom is being remodeled, asking for reinforcement in likely future grab bar locations can be a sensible step even if bars are not being installed immediately.
Installation Best Practices for Safety and Compliance
Installation quality matters as much as placement. A grab bar that is mounted in the wrong material or with the wrong hardware may look se while offering much less support than expected.
The safest general practice is to mount grab bars to solid framing or approved structural backing. In many bathrooms, that means locating wall studs or confirming that blocking was installed behind the finished wall. Hollow-wall mounting methods may be marketed for some situations, but they should not be treated as interchangeable with direct structural anchoring.
Some installation guidance references 3/8-inch stainless steel bolts for certain wall anchoring situations. Hardware choice, however, should match the wall type, bar design, manufacturer instructions, and local code expectations. The broader rule is to use corrosion-resistant hardware that is appropriate for wet environments and rated for the installation method.
A practical installation sequence looks like this:
- Identify the user's key movement points around the toilet, tub, and shower.
- Mark the intended bar height and orientation.
- Verify stud or blocking locations before finalizing placement.
- Check clearance from fixtures, doors, and shower enclosures.
- Install with suitable hardware for the wall assembly and wet location.
- Test for rigidity and recheck fasteners after installation.
There are also a few common mistakes worth avoiding:
| Mistake | Why it causes problems |
|---|---|
| Mounting only to drywall or thin wall finish | May not provide reliable load support |
| Copying a layout without measuring the room | Can create awkward reach or blocked access |
| Installing too low or too high for the user | Reduces practical support during transfers |
| Ignoring future needs | May lead to another renovation later |
| Skipping professional review for complex walls | Increases the chance of structural or code issues |
For straightforward projects, a qualified installer may be able to complete the work quickly. But professional help becomes especially important when:
- tile must be drilled without damaging waterproofing
- stud locations do not line up with the ideal placement
- reinforcement may need to be added behind the wall
- local code compliance is unclear
- the user has specific mobility limitations that affect placement
This is also where a broader senior fall prevention checklist can help. Grab bars work best alongside other bathroom safety steps such as non-slip flooring, good lighting, a stable shower seat when appropriate, and clear floor space for turning and transfers.
The goal is not to promise that grab bars will prevent every fall. It is to install them where they can provide dependable support during everyday bathroom routines.
Conclusion
Good grab bar placement is a mix of measurement, structure, and real-life use. ADA guidance offers a helpful baseline for common heights and locations, while Canadian code and housing references add an important focus on reinforcement and renovation readiness.
For families planning grab bars for seniors, the safest approach is to match placement to the person's actual movements, verify that the wall can support the load, and confirm any local code requirements before installation. That can improve bathroom support without overstating what grab bars can do on their own.
If the bathroom layout is unusual, the walls are older, or compliance is uncertain, a licensed professional can help verify placement and mounting details. That extra step can make a practical home safety upgrade more reliable over time.